Imagine holding two pieces of wood in your hands, dreaming of building something beautiful – maybe a bookshelf for your living room, a coffee table for your patio, or even a birdhouse for your backyard. The question is: how do you connect those pieces so they stay strong and look great? That’s where wood joining techniques for beginners come into play! Whether you’re dealing with Arizona’s dry heat or Florida’s humid summers, mastering these basic methods will help you create projects that last for years.
In this comprehensive guide, I’ll walk you through all the essential wood joining techniques for beginners, from simple glue joints to more advanced dado connections. We’ll cover everything you need to know, including:
- The fundamental tools every beginner should have
- Step-by-step instructions for each technique
- Climate-specific tips for different regions of the U.S.
- Common mistakes to avoid
- Pro tips from experienced woodworkers
No fancy tools or confusing jargon – just clear, practical advice you can start using today. Let’s dive into the wonderful world of wood joining!
Why Mastering Wood Joining Techniques Matters for Beginners
When I first started woodworking, I made the mistake of thinking any old nail or screw would do the job. I tried hammering pieces together haphazardly, only to watch my projects wobble and fall apart within weeks. That’s when I discovered how crucial proper wood joining techniques for beginners really are.
These methods aren’t just about making pieces stick together – they’re about:
- Creating structural integrity: Proper joints prevent wobbling and collapse
- Ensuring longevity: Well-made joints withstand years of use
- Achieving professional results: Clean joints make projects look store-bought
- Saving money: Good joints mean less repairs and replacements
For example, if you’re building outdoor furniture in rainy Seattle, you’ll need different wood joining techniques for beginners than someone crafting indoor shelves in dry Denver. The humidity, temperature swings, and even local pests all affect which methods work best in your area.
Understanding these wood joining techniques for beginners transformed my projects from rickety messes to sturdy, professional-looking pieces. And the best part? You don’t need expensive tools or years of experience to get started.
Essential Tools for Wood Joining Beginners


Before we dive into specific wood joining techniques for beginners, let’s cover the basic tools you’ll need. Don’t worry – you don’t need to break the bank!
Must-Have Tools for Beginners
- Measuring and Marking Tools
- Tape measure (Stanley PowerLock is a great choice)
- Combination square (for perfect 90° angles)
- Carpenter’s pencil (wider lead won’t roll away)
- Cutting Tools
- Japanese pull saw (easier for beginners than push saws)
- Miter box (for accurate angled cuts)
- Coping saw (for curved cuts)
- Joining Tools
- Clamps (at least 4 – two 12″ and two 6″)
- Cordless drill/driver (Ryobi makes affordable starter sets)
- Hammer (16oz curved claw)
- Safety Gear
- Safety glasses (ANSI Z87.1 rated)
- Hearing protection (for power tools)
- Dust mask (N95 rating)
Regional Tool Recommendations
- Humid climates (Florida, Louisiana): Add stainless steel fasteners to prevent rust
- Dry climates (Arizona, Nevada): Include wood conditioner to prevent splitting
- Cold regions (Minnesota, Maine): Consider battery-powered tools that work in low temps
Remember, as you explore wood joining techniques for beginners, you can always rent specialized tools from Home Depot before investing in your own.
Detailed Guide to Basic Wood Joining Techniques

Now let’s explore the fundamental wood joining techniques for beginners in detail. I’ll walk you through each method with clear, step-by-step instructions.
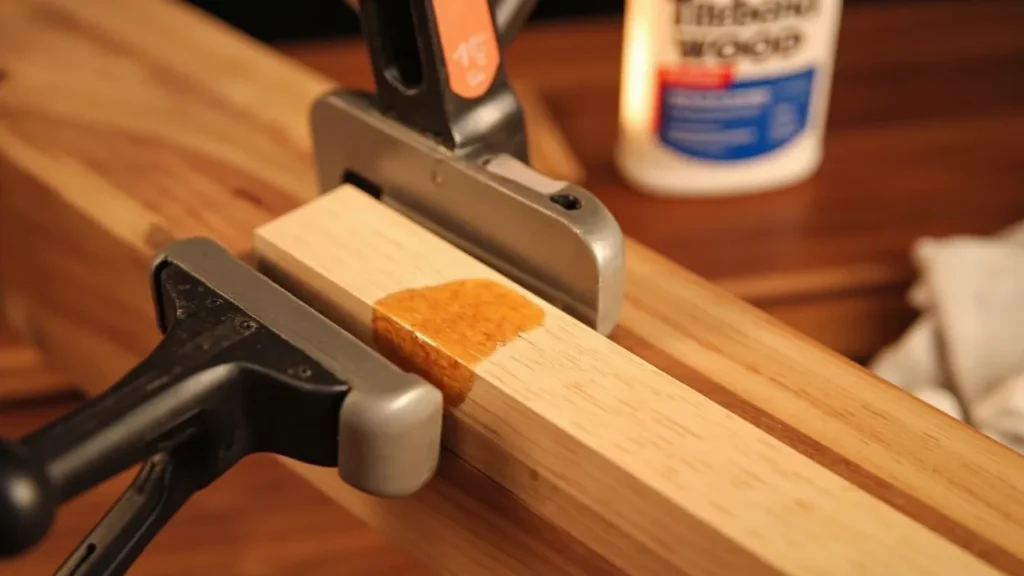
1. Glue Joints: The Simplest Wood Joining Technique for Beginners
Best for: Small projects, decorative items, quick repairs
Materials Needed:
- Wood glue (Titebond III for water resistance)
- Clamps
- Damp cloth
Step-by-Step Process:
- Surface Preparation:
- Sand both surfaces with 120-grit sandpaper
- Wipe away dust with tack cloth
- Glue Application:
- Apply thin, even bead of glue
- Spread with plastic spreader or finger (wear gloves)
- Assembly:
- Press pieces together firmly
- Wipe excess glue with damp cloth
- Clamping:
- Use at least two clamps
- Check for square with combination square
- Drying:
- Leave clamped for 24 hours
- Avoid moving during cure time
Pro Tip: In humid areas like Houston, extend drying time by 50%. In dry climates like Phoenix, lightly mist joints before gluing.
Common Mistakes:
- Using too much glue (creates weak joints)
- Not clamping properly (leads to gaps)
- Moving pieces too soon (breaks bond)
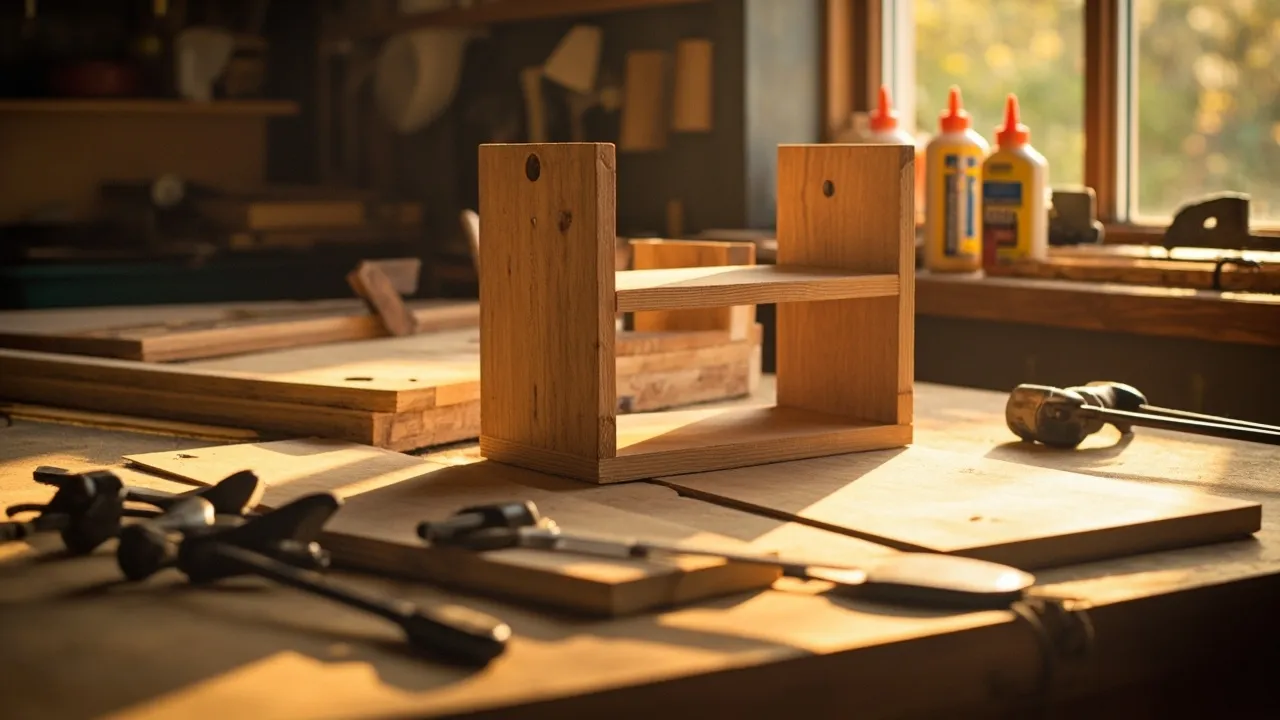
2. Dado Joints: The Beginner’s Guide to Strong Shelving
Best for: Bookcases, cabinets, shelving units
Materials Needed:
- Circular saw or router
- Straight edge guide
- Chisels
Step-by-Step Process:
- Measuring:
- Mark dado width on workpiece
- Account for 1/32″ extra space for glue
- Cutting:
- Set saw blade to 1/3 material thickness
- Make multiple passes for clean cuts
- Cleaning:
- Use chisel to remove waste
- Test fit before gluing
- Assembly:
- Apply glue to all surfaces
- Clamp until dry
Regional Adaptation:
- In earthquake-prone California, add screws through the back for extra strength
- In termite-heavy Alabama, treat wood with borate solution first
Why This Matters:
Among all wood joining techniques for beginners, dados provide exceptional strength for vertical loads – perfect for bookshelves that might hold heavy volumes.
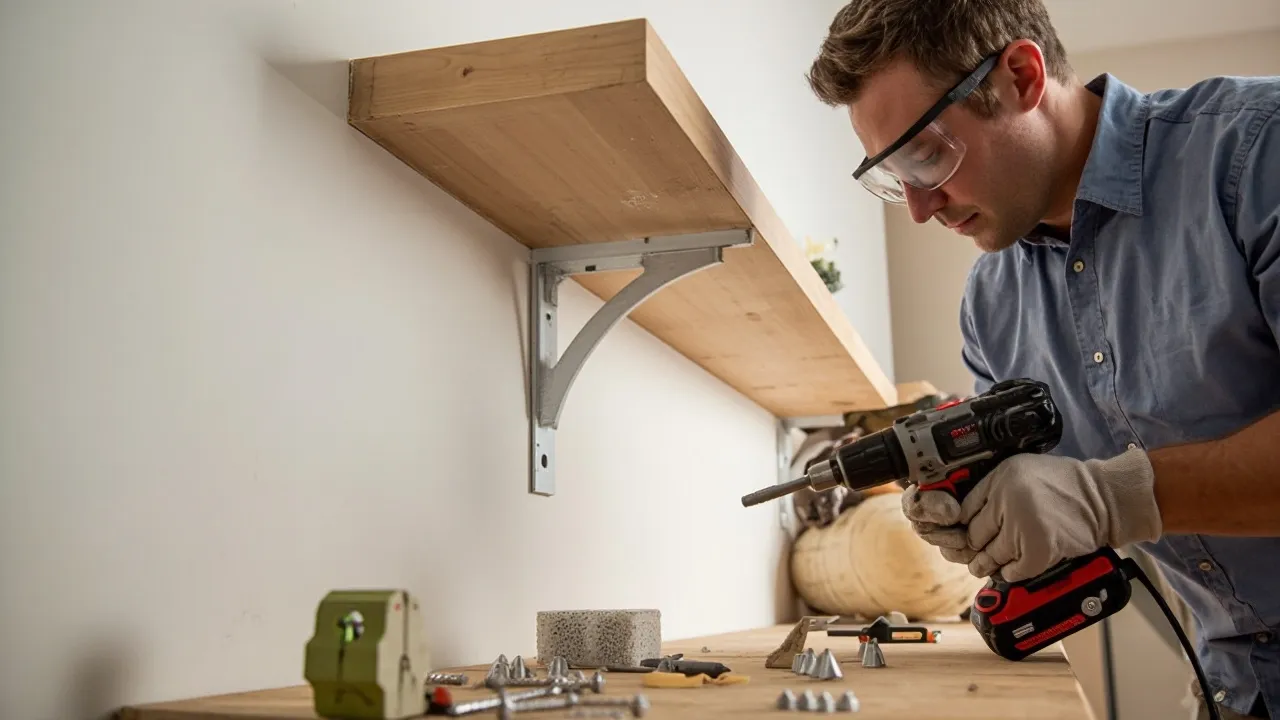
3. Pocket Hole Joinery: Quick and Strong Connections
Best for: Face frames, tables, chairs
Materials Needed:
- Kreg Jig (R3 model for beginners)
- Special stepped drill bit
- Square drive screws
Step-by-Step Process:
- Jig Setup:
- Adjust collar for material thickness
- Secure jig to workbench
- Drilling:
- Drill at recommended depth
- Clear sawdust between holes
- Assembly:
- Apply glue to joint
- Drive screws at medium speed
Pro Tip: In coastal areas like Florida, use marine-grade plywood and stainless screws to resist salt air corrosion.
Why Beginners Love This:
Of all wood joining techniques for beginners, pocket holes offer the perfect balance of strength and simplicity – you can build a complete bed frame in an afternoon!
Advanced Beginner Techniques
Once you’ve mastered these basic wood joining techniques for beginners, consider progressing to:
- Biscuit Joints: Great for aligning edges
- Mortise and Tenon: Traditional furniture-making
- Dovetails: Beautiful drawer construction
Frequently Asked Questions About Wood Joining Techniques for Beginners
1. What’s the easiest wood joining technique for absolute beginners?
For complete beginners, glue joints are the simplest way to start. All you need is wood glue and clamps no special tools required. Among all wood joining techniques for beginners, this is the most forgiving and requires the least investment.
Pro Tip: If you’re in a humid area like Florida, use waterproof glue (like Titebond III) to prevent weakening over time.
2. How do I make my wood joints stronger?
Even with basic wood joining techniques for beginners, you can improve strength by:
- Using both glue and screws/nails (combining methods adds durability)
- Clamping properly (prevents gaps that weaken joints)
- Choosing the right joint for the project (e.g., dados for shelves, pocket holes for furniture)
Regional Tip: In earthquake-prone areas like California, reinforce joints with metal brackets for extra stability.
3. Can I join wood without nails or screws?
Yes! Many wood joining techniques for beginners rely on glue, friction, or interlocking joints, such as:
- Dados (grooves that hold shelves in place)
- Mortise and tenon (a peg-and-hole system)
- Biscuit joints (small wooden pieces that align edges)
These methods create clean, nail-free finishes perfect for visible furniture pieces.
4. What’s the best wood joining method for outdoor projects?
For outdoor use (like decks or garden furniture), the best wood joining techniques for beginners include:
- Pocket holes with stainless steel screws (resists rust)
- Waterproof wood glue (won’t break down in rain)
- Notched joints (for added structural support)
Regional Tip: In snowy areas like Minnesota, use pressure-treated lumber to prevent rot from moisture.
5. How do I fix a weak or broken wood joint?
If a joint fails, try these fixes (based on wood joining techniques for beginners):
- Re-glue and clamp (if the break is clean)
- Add screws or dowels (for reinforcement)
- Use a metal bracket (for heavy-duty repairs)
Pro Tip: Sand the broken surfaces before re-gluing for better adhesion.
6. Do I need expensive tools for strong wood joints?
Not at all! Many wood joining techniques for beginners require just basic tools:
- Hand saw + chisel (for dados)
- Clamps + glue (for simple joints)
- Drill + screws (for pocket holes)
You can upgrade to power tools later, but starting simple works fine.
7. How long should I let wood glue dry before handling?
Most wood joining techniques for beginners recommend:
- 30 minutes for initial bonding
- 24 hours for full strength
- 48 hours in humid climates (like Louisiana)
Never rush drying time weak joints happen when glue isn’t fully cured.
8. Which wood joints are best for furniture?
For sturdy furniture, these wood joining techniques for beginners work best:
- Pocket holes (fast & strong)
- Dados (great for shelves)
- Mortise and tenon (for table legs)
Regional Tip: In dry states like Arizona, seal joints to prevent wood shrinkage.
9. Can I use wood filler to hide joints?
Yes! Many wood joining techniques for beginners leave visible gaps, but you can:
- Sand smooth after glue dries
- Use wood filler (stainable for a seamless look)
- Hide with trim (for a polished finish)
10. Where can I learn more advanced wood joints?
Once you master these wood joining techniques for beginners, try:
- YouTube tutorials (for visual learning)
- Local woodworking classes (check Home Depot workshops)
- Books like “The Joint Book” (covers 50+ joint types)
Remember – every expert woodworker started with these same wood joining techniques for beginners. With practice, you’ll develop the skills to tackle any project!