Woodworking is one of the most rewarding and satisfying hobbies you can pursue. There’s something truly magical about transforming rough, raw lumber into beautiful, functional pieces with your own two hands. But if you’re just starting out, I’ll be honest with you – it can feel incredibly overwhelming at first. I vividly remember my first woodworking project: a simple pine bookshelf that ended up looking like it had survived a hurricane. The shelves were uneven, the joints were gaping, and the whole thing wobbled like a drunk sailor. I made nearly every one of the most common woodworking mistakes for beginners in that single project!
Table of Contents
But here’s the good news: every master woodworker started exactly where you are now. Those early mistakes? They’re not failures – they’re valuable lessons in disguise. In this comprehensive 5,000-word guide, we’ll walk through all the most common woodworking mistakes for beginners and show you exactly how to avoid them. Whether you’re building your first cutting board, a simple shelf, or dreaming about crafting an heirloom-quality dining table, these insights will save you time, money, and countless frustrations.
Why Do Beginners Make These Woodworking Mistakes?
Before we dive into the specific most common woodworking mistakes for beginners, it’s important to understand why these errors happen so frequently. Woodworking is a unique blend of art, science, and craftsmanship that requires patience, precision, and practice – three things most beginners are still developing.
As novices, we often rush into projects with enthusiasm but without fully understanding the fundamentals. Maybe we skip the “measure twice” part and go straight to cutting. Perhaps we try to use the same cheap tools our grandpa had in his basement. Or we might underestimate how much wood moves and changes with the seasons. These are all classic examples of the most common woodworking mistakes for beginners.
The reality is that woodworking skills develop over time through experience. But by learning from others’ mistakes (like mine!), you can dramatically shorten your learning curve. That’s exactly why we’ve created this in-depth guide to the most common woodworking mistakes for beginners – so you can avoid the pitfalls that trip up nearly every new woodworker.
1. Not Measuring Accurately – The Cardinal Sin of Woodworking

When it comes to the most common woodworking mistakes for beginners, inaccurate measurement tops the list every time. I can’t count how many pieces of wood I’ve ruined by cutting them just a hair too short or discovering my “perfect” measurements were off by a critical fraction of an inch.
Why This Mistake Happens So Often
- Misreading tape measures: Those tiny lines can be confusing when you’re starting out
- Forgetting about the kerf: The width of your saw blade removes material too
- Poor marking techniques: Faint pencil lines that disappear when cutting
- Math errors: Simple addition mistakes when calculating dimensions
How to Avoid Measurement Mistakes Like a Pro
✔ Invest in Quality Measuring Tools
A flimsy, bargain-bin tape measure will give you bargain-bin results. Look for:
- A sturdy 25-foot tape measure (Stanley FatMax is excellent)
- A reliable combination square (Empire or Starrett)
- A precision marking gauge for layout work
✔ Master the “Measure Twice, Cut Once” Mantra
This old adage exists for good reason. Here’s how to implement it:
- Take your initial measurement
- Verify it immediately
- Mark your cut line clearly with a sharp pencil or marking knife
- Measure one final time before cutting
✔ Understand and Account for Kerf
Every saw blade removes material – typically about 1/8″ for most circular saw blades. This means:
- Your cut piece will be slightly smaller than your measurement
- The leftover piece will be slightly larger
Always cut on the waste side of your line!
✔ Use Story Sticks for Repetitive Cuts
For projects requiring multiple identical pieces:
- Cut one perfect reference piece
- Use it as a physical template for all others
- No math required!
✔ Implement a Clear Marking System
Develop consistent marks like:
- X’s on waste sections
- Arrows pointing to cut lines
- Labels for each piece (A, B, C, etc.)
✔ Avoid the “Eyeballing” Trap
Even small measurement errors compound:
- A 1/16″ error on six cuts becomes 3/8″ total
- This can make joints not fit properly
Pro Measurement Tips from the Experts
“When cutting plywood, apply masking tape along your cut line first. This reduces splintering and gives you a clearer line to follow.” – Mark Spagnuolo, The Wood Whisperer
“Invest in a good digital caliper for fine measurements. The $30 you spend will save hundreds in wasted materials.” – Laura Kampf, Maker
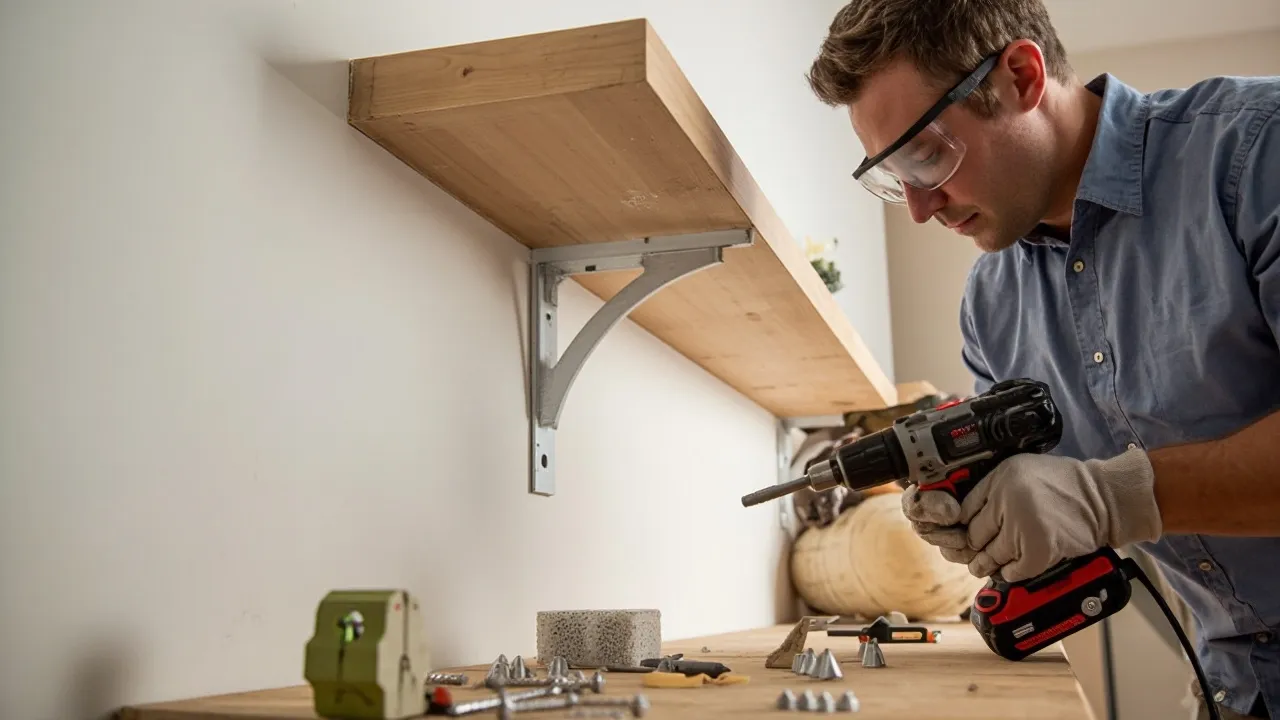
2. Using the Wrong Tools – Setting Yourself Up for Failure
Another one of the most common woodworking mistakes for beginners is tool-related. When I started, I thought I could build anything with just a handsaw and a hammer. Boy, was I wrong! Using improper or low-quality tools is a surefire path to frustration and poor results.
The Most Frequent Tool Mistakes Beginners Make
- Using dull blades that tear rather than cut cleanly
- Choosing the wrong saw for the job (like using a jigsaw for long straight cuts)
- Not securing workpieces properly (leading to dangerous kickback)
- Buying cheap tools that break or perform poorly
- Using tools incorrectly due to lack of instruction
The Essential Beginner’s Tool Kit
🛠 Absolute Must-Have Starter Tools
- Circular Saw (for straight cuts in sheet goods)
- Jigsaw (for curved cuts and shapes)
- Power Drill/Driver (for holes and fasteners)
- Bar Clamps (at least 4 in various sizes)
- Chisels (1/4″, 1/2″, 3/4″ for joinery)
- Block Plane (for fine adjustments)
- Random Orbital Sander (for efficient sanding)
🛠 Nice-to-Have Upgrades for Growing Your Skills
- Miter Saw (for precise angled cuts)
- Router (for edges, grooves, and joinery)
- Biscuit Joiner (for strong panel joints)
- Dust Collection System (for cleaner air)
How to Avoid Tool-Related Mistakes
✔ Buy Quality Over Quantity
It’s better to have a few good tools than many poor ones:
- Look for brands like DeWalt, Bosch, or Makita
- Check used tool markets (many great deals available)
- Avoid “all-in-one” combo kits with inferior components
✔ Learn Proper Tool Techniques
Before using any new tool:
- Watch multiple tutorial videos
- Read the manual thoroughly
- Practice on scrap wood
- Ask experienced woodworkers for tips
✔ Keep Your Tools Sharp and Maintained
Dull tools are dangerous and produce poor results:
- Learn to sharpen chisels and plane blades
- Replace saw blades when they dull
- Clean tools after each use
✔ Use Appropriate Safety Gear
Never skip:
- Safety glasses
- Hearing protection
- Dust mask/respirator
- Push sticks for table saws
Pro Tool Tips from the Masters
“Build your tool collection slowly as your skills grow. Start with versatile tools that can handle multiple tasks well.” – Paul Sellers, Master Woodworker
“Don’t be afraid to modify tools to work better for you. Add grip tape, make custom fences, or adjust handles to fit your hands.” – Jimmy DiResta, Maker
3. Ignoring Wood Grain – The Hidden Factor in Quality Work
One of the most overlooked yet critical aspects in the most common woodworking mistakes for beginners is failing to properly account for wood grain. When I first started, I thought grain direction was just about appearance – I had no idea how dramatically it affects every aspect of woodworking.
What Happens When You Ignore Grain Direction?
- Tear-out during cutting: The wood fibers rip out rather than cut cleanly
- Uneven sanding results: Cross-grain sanding leaves visible scratches
- Weak joints: End grain doesn’t glue well to side grain
- Finishing problems: Stain absorbs unevenly across different grain patterns
How to Properly Work With Wood Grain
✔ Identifying Grain Direction
Look for:
- The long, parallel lines running along the board
- The way the wood “feels” when you run your hand along it (smoother with the grain)
- Growth ring patterns on the end grain
✔ Cutting With the Grain
Always orient your cuts so the blade follows the grain direction:
- For table saw cuts, the grain should run parallel to the blade
- For hand planing, always go with the grain to prevent tear-out
✔ Sanding With the Grain
The golden rule:
- Always sand parallel to the grain lines
- Start with coarser grits (80-120) to remove imperfections
- Progress to finer grits (150-220) for smoothness
- Final sand with 220+ for finishing readiness
✔ Gluing Considerations
Understand that:
- End grain to end grain joints are weakest
- Side grain to side grain bonds strongest
- Use specialized glues for end grain applications
Pro Grain Tips from Veteran Woodworkers
“When planing difficult grain, try angling your plane slightly rather than going perfectly straight. This often produces cleaner results.” – Christopher Schwarz, Hand Tool Expert
“For tricky grain that tears out no matter what, try lightly wetting the surface before final planing. The moisture helps fibers cut cleaner.” – Shannon Rogers, The Renaissance Woodworker
4. Skipping Proper Sanding – The Difference Between Amateur and Pro Results


In my early projects, I absolutely hated sanding. It felt like tedious, unnecessary work – until I saw how my finishes looked without proper sanding preparation. Now I understand why skipping sanding is one of the most common woodworking mistakes for beginners with such obvious consequences.
Why Proper Sanding Matters So Much
- Removes all saw marks and machine marks
- Eliminates small dings and imperfections
- Opens the wood pores for even finish absorption
- Creates the smooth surface needed for quality finishes
- Prevents splinters in handling
The Step-by-Step Sanding Process Professionals Use
- Initial Rough Sanding (80-100 grit)
- Removes major imperfections
- Levels any uneven surfaces
- Don’t skip this even if the wood feels smooth!
- Medium Grit Sanding (120-150 grit)
- Removes scratches from the coarse sanding
- Further refines the surface
- Pay extra attention to edges and corners
- Fine Grit Sanding (180-220 grit)
- Creates the final pre-finish surface
- Removes any remaining minor scratches
- Prepares wood for staining or finishing
- Final Wipe Down
- Use a tack cloth to remove all dust
- Wipe with mineral spirits to reveal any missed spots
- Feel the surface with your bare hand – it should feel perfectly smooth
Pro Sanding Techniques You Should Know
✔ Always Sand With the Grain
Cross-grain sanding leaves visible scratches that become obvious under finish.
✔ Use Sanding Blocks for Flat Surfaces
Hand sanding alone creates uneven pressure and wavy surfaces.
✔ Change Sandpaper Frequently
Dull paper just burns the wood rather than cutting effectively.
✔ Try Cabinet Scrapers for Difficult Areas
They can remove material cleanly where sandpaper struggles.
Pro Sanding Tips from the Experts
“Many beginners stop sanding too soon. The surface should feel like glass before finishing – if you can feel any roughness, keep sanding!” – Marc Adams, Marc Adams School of Woodworking
“For difficult woods like maple or cherry that tend to burnish, try using a sanding sponge rather than paper – it conforms better to the surface.” – Michael Fortune, Furniture Maker
5. Not Accounting for Wood Movement – Why Your Projects Crack and Warp
Perhaps the most surprising of the most common woodworking mistakes for beginners is failing to account for wood movement. When I built my first solid wood table, I couldn’t understand why the top developed huge cracks after just one season. The answer? Wood is alive and constantly moving.
The Science Behind Wood Movement
Wood expands and contracts across the grain (not along its length) in response to:
- Humidity changes
- Temperature fluctuations
- Moisture content variations
This movement can be significant:
- A 12″ wide oak board can move up to 1/4″ between seasons
- Pine moves less but still enough to cause problems
How to Design for Wood Movement
✔ Use Kiln-Dried Lumber
Kiln drying stabilizes wood more than air drying:
- Look for KD (kiln dried) stamps
- Ideal moisture content is 6-8% for indoor furniture
✔ Allow for Expansion in Table Tops
Use proper attachment methods:
- Figure-8 fasteners
- Slotted screw holes
- Wooden buttons
- Specialty tabletop fasteners
✔ Avoid Gluing Cross-Grain Constructions
Examples of problematic designs:
- Solid wood panels glued to frames
- Breadboard ends glued along entire length
- Fixed shelves in casework
✔ Use Floating Joints Where Needed
Allow movement with:
- Sliding dovetails
- Elongated screw holes
- Loose tenons
Pro Wood Movement Tips
“Always design assuming the wood will move. If you think you’re leaving enough room for expansion, leave a little more.” – Garrett Hack, Furniture Maker
“For tabletops, I attach the center firmly but allow the ends to float. This prevents cracks while keeping the top flat.” – Christian Becksvoort, Shaker Furniture Expert
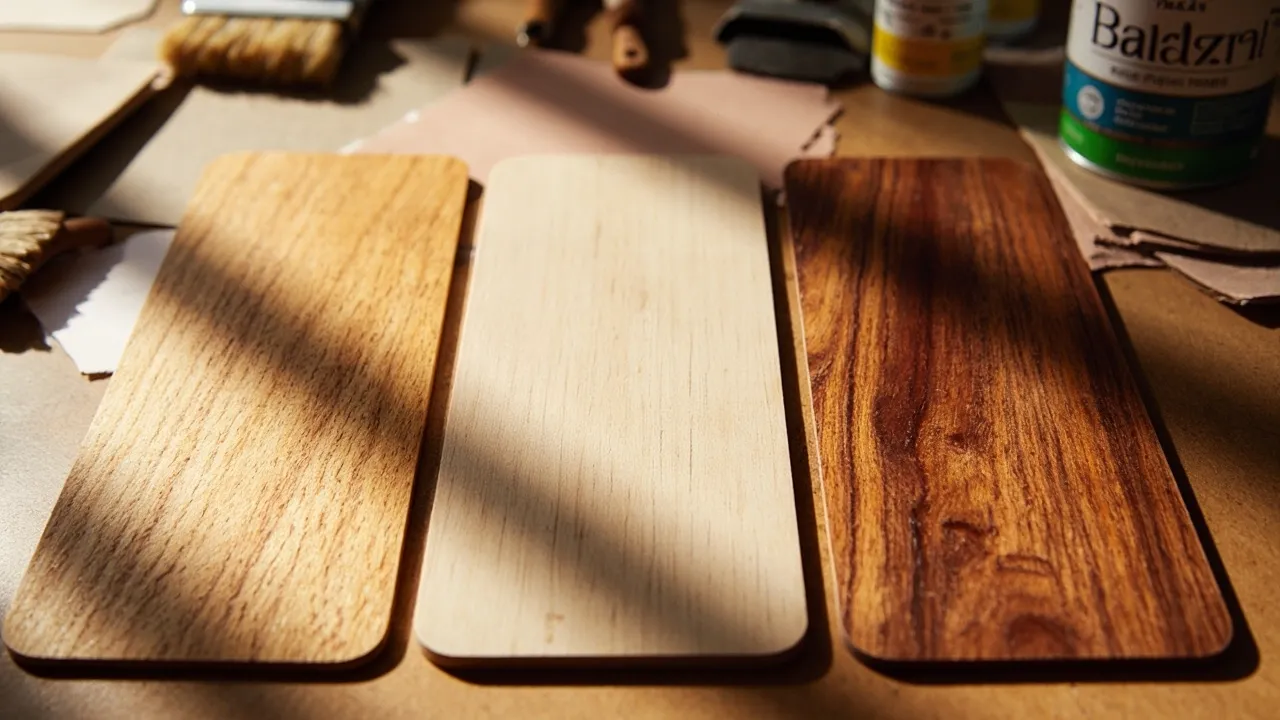
6. Rushing the Finishing Process – Where Good Projects Go Bad
The final item in our list of most common woodworking mistakes for beginners is rushing the finishing process. After spending hours building something beautiful, it’s tempting to slap on some stain and call it done. But finishes reveal every flaw and amplify any shortcuts you’ve taken.
Common Finishing Mistakes
- Applying stain too thickly (causing blotching)
- Not sanding between coats (leaving rough texture)
- Skipping wood conditioner (uneven absorption)
- Working in poor conditions (dusty or cold)
- Not allowing proper drying time between coats
The Professional Finishing Process
- Surface Preparation
- Sand through all grits (80-220+)
- Remove all dust with tack cloth
- Wipe with mineral spirits to reveal flaws
- Staining (If Desired)
- Apply pre-stain conditioner to problem woods
- Wipe stain on evenly with clean rag
- Immediately wipe off excess
- Allow full dry time (usually 24 hours)
- Top Coat Application
- Use brush, rag, or sprayer appropriate for your finish
- Apply thin, even coats
- Sand lightly between coats with 320+ grit
- Allow full cure time before use
Pro Finishing Secrets
✔ Test First on Scrap Wood
Always test your entire finish process on extra material.
✔ Work in a Clean, Dust-Free Area
Even a single dust nib can ruin a perfect finish.
✔ Maintain a “Wet Edge”
Avoid overlap marks by working systematically.
✔ Consider Water-Based Finishes
They dry faster with less odor than oil-based.
Pro Finishing Advice
“The difference between a good finish and a great one is often just one more coat and one more sanding.” – Jeff Jewitt, Finishing Expert
“Don’t judge your finish right after applying it. Many finishes look terrible until they fully cure – sometimes days later.” – Michael Dresdner, Finishing Consultant
Regional Woodworking Considerations Across the U.S.

Woodworking needs vary dramatically depending on your location. Here’s how to adjust for different climates to avoid the most common woodworking mistakes for beginners in your area:
| Region | Climate Challenges | Special Considerations | Recommended Products |
|---|---|---|---|
| Pacific Northwest | High humidity, rain | Prevent mold/mildew, use rot-resistant woods | Thompson’s WaterSeal, Cedar/Pressure-treated lumber |
| Southwest | Extreme dry heat | Wood shrinkage issues, glue failures | Kiln-dried lumber, Titebond III glue |
| Midwest | Wide seasonal swings | Major wood movement | Quartersawn lumber, flexible joinery |
| Northeast | Cold winters, humidity | Finish durability issues | Epoxy primers, marine varnishes |
| Southeast | High humidity, pests | Insect damage, warping | Pressure-treated wood, copper naphthenate |
Essential Tools and Materials Sources
Building your workshop while avoiding the most common woodworking mistakes for beginners means getting quality materials from reliable sources:
Big Box Stores (Good for Beginners):
- Home Depot
- Lowe’s
- Menards
Specialty Woodworking Suppliers:
- Woodcraft
- Rockler
- Highland Woodworking
Online Resources:
- Amazon (for basic tools)
- eBay (for used equipment)
- Specialty lumber websites
Final Thoughts: Embracing the Learning Process
As we’ve seen throughout this guide, the most common woodworking mistakes for beginners are all part of the learning process. Every master woodworker made these same errors when they started – the difference is they learned from them and kept improving.
Remember these key takeaways:
✅ Precision measuring prevents most problems before they start
✅ Quality tools are worth every penny in saved frustration
✅ Wood grain affects everything from cutting to finishing
✅ Proper sanding makes the difference between amateur and pro results
✅ Wood movement must be accounted for in all designs
✅ Rushing finishes ruins hours of careful work
Woodworking is a journey that lasts a lifetime. Each project will teach you something new, and each mistake will make you a better craftsman. Don’t be discouraged by errors – they’re proof you’re pushing your skills forward.
Now grab some wood, put these lessons into practice, and start creating! Your perfect project is just a few saw cuts away.
Frequently Asked Questions
Q: What’s the absolute easiest wood for complete beginners?
A: Pine is the most forgiving beginner wood – it’s soft, inexpensive, and readily available at any home center. Poplar is another great choice that’s slightly harder but still easy to work.
Q: How do I prevent tear-out when planing difficult woods?
A: Try these pro techniques:
- Sharpen your plane blade razor-sharp
- Set the plane for a very fine cut
- Dampen the wood surface slightly
- Angle your plane slightly across the grain
- Use a backing board when planing edges
Q: Can I use construction lumber from Home Depot for furniture?
A: Yes, but with caveats:
- Let it dry/acclimate in your shop for several weeks
- Expect more movement than kiln-dried hardwoods
- Select the straightest boards possible
- Be prepared to joint/plane it flat
Q: How important is a workshop dust collection system?
A: Extremely important for:
- Your health (breathing sawdust is dangerous)
- Tool performance (dust clogs mechanisms)
- Finish quality (dust ruins surfaces)
Start with at least a good shop vacuum, ideally moving to a dedicated DC system.
Q: What’s the one tool most beginners should splurge on?
A: A quality tablesaw will give you the most versatility and precision for the money. Look for:
- A solid fence system
- Good dust collection
- Enough power for hardwoods
Consider the SawStop if budget allows for its safety features.
By understanding and avoiding these most common woodworking mistakes for beginners, you’re already ahead of 90% of new woodworkers. Now go make some sawdust!