The Glue Dilemma Every Woodworker Faces
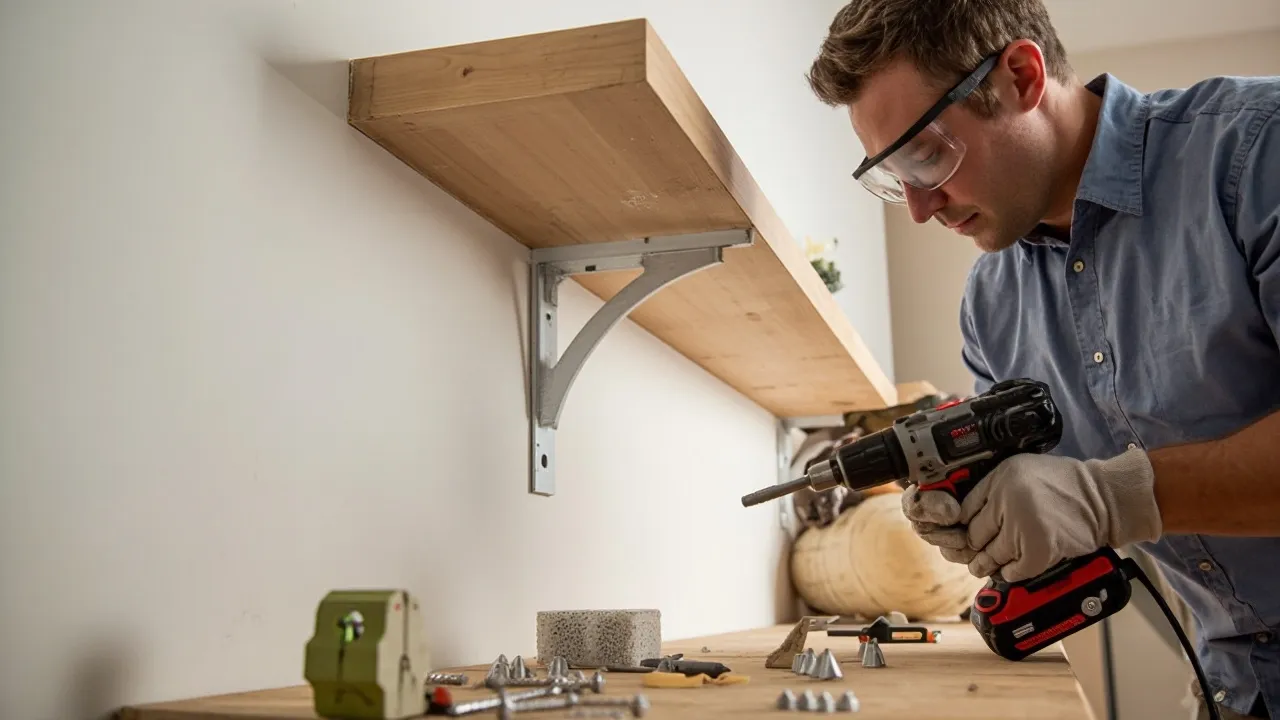
Woodworking is one of those hobbies that can bring so much joy and satisfaction. There’s nothing quite like the feeling of creating something beautiful and functional with your own two hands. But let’s be honest—glue can be a real pain sometimes. Whether it’s sticky stains ruining your project or weak bonds that make your masterpiece fall apart, glue problems can turn a fun project into a frustrating mess.
I’ve been there. I’ve had my fair share of glue disasters, from accidentally smearing it all over a perfectly sanded tabletop to realizing too late that my joints weren’t holding up. But over time, I’ve learned how to avoid these issues, and today, I’m sharing everything I know with you about fixing glue issues in woodworking projects. Whether you’re a beginner or a seasoned woodworker, these comprehensive tips will help you tackle glue problems like a professional craftsman.
Fixing glue issues in woodworking projects isn’t just about solving problems when they occur—it’s about developing a systematic approach to prevent them from happening in the first place. In this ultimate guide, we’ll explore every aspect of wood glue application, from selecting the right adhesive for your specific project to advanced techniques used by professional furniture makers. By the time you finish reading, you’ll have all the knowledge you need to ensure perfect glue joints every time.
Why Fixing Glue Issues in Woodworking Projects is Absolutely Essential
Glue is the unsung hero of woodworking. It holds everything together, but when it doesn’t work as it should, your entire project can fall apart literally. Fixing glue issues in woodworking projects isn’t just about making your work look better; it’s about ensuring your creations are strong, durable, and built to last for generations.
The importance of fixing glue issues in woodworking projects becomes clear when you consider that modern wood glues create bonds that are often stronger than the wood itself. When properly applied, the glue penetrates the wood fibers and creates a molecular connection that’s virtually unbreakable. However, when something goes wrong with the glue application, you can end up with joints that fail at the worst possible moment.
Table of Contents
From choosing the right glue for the job to applying it correctly under optimal conditions, there are so many factors that affect glue performance. And trust me, once you master these techniques for fixing glue issues in woodworking projects, you’ll wonder why you ever struggled in the first place. The peace of mind that comes with knowing your joints are solid and your finishes will be flawless is priceless for any serious woodworker.
The Science Behind Wood Glue Performance
To truly understand fixing glue issues in woodworking projects, it helps to know what’s happening at the microscopic level. Different types of wood glues work through different mechanisms:
- PVA (Polyvinyl Acetate) Glues: These common woodworking adhesives work through water evaporation. As the water content evaporates, the glue forms strong polymer chains that penetrate the wood fibers.
- Polyurethane Glues: These react with moisture in the air or wood to cure, expanding slightly as they do so to fill small gaps.
- Epoxy Resins: These two-part adhesives create bonds through an exothermic chemical reaction between resin and hardener.
- Hide Glues: Traditional protein-based glues that bond as they cool and dry, remaining reversible with heat and moisture.
Understanding these differences is crucial for fixing glue issues in woodworking projects because it helps you select the right adhesive for each specific application and troubleshoot problems when they occur.
Comprehensive Solutions for Common Glue Problems
Let’s dive deep into the most common glue issues woodworkers face and the professional techniques for fixing glue issues in woodworking projects effectively.
1. Glue Stains: Prevention and Professional Removal Techniques

Few things are more frustrating than spending hours carefully preparing and finishing a beautiful wood surface, only to ruin it with visible glue stains. Fixing glue issues in woodworking projects often starts with preventing these stains before they happen.
Advanced Prevention Methods:
- The Double Glue Line Technique: Apply a thin bead of glue about 1/4″ from the edge on both pieces being joined. When clamped, this creates an internal glue line that won’t squeeze out to the visible surfaces.
- Pre-finishing Strategy: Apply your first coat of finish before assembly. The sealed surface won’t absorb excess glue, making cleanup significantly easier.
- Specialized Application Tools: Invest in glue syringes or needle-tip bottles for precise application in tight spaces where cleanup would be particularly difficult.
Professional Removal Methods for Dried Glue:
When prevention fails, fixing glue issues in woodworking projects requires knowing how to remove stains without damaging your work:
- For Fresh Glue: Use a damp cloth with distilled water (minerals in tap water can cause additional staining)
- For Semi-Cured Glue: Carefully scrape with a plastic putty knife or old credit card at a 15-degree angle
- For Fully Cured PVA Glue: Use specialized glue removers like Goo Gone for Wood or make a paste from baking soda and water
- For Epoxy Residue: Apply acetone with a soft cloth (test first on inconspicuous area)
- For Polyurethane Glue: Carefully pare away with a sharp chisel after fully curing
Pro Tip from a Furniture Restorer: Always test removal methods on scrap wood first to ensure they won’t affect your finish. Work gradually from least to most aggressive methods.
2. Weak Bonds: Causes and Professional Solutions


Fixing glue issues in woodworking projects often involves addressing weak bonds that compromise structural integrity. Here’s an in-depth look at causes and solutions:
Common Causes of Weak Bonds:
- Starved Joints: Too little glue or excessive clamp pressure squeezes out all the adhesive
- Surface Contamination: Oils, dust, or old glue prevent proper adhesion
- Incompatible Materials: Using the wrong glue type for your specific wood or application
- Environmental Factors: Temperature and humidity extremes affect curing
- Improper Clamping: Uneven pressure or insufficient clamping time
- Material Movement: Wood expansion/contraction breaking the bond over time
Advanced Techniques for Stronger Bonds:
- The Glue Sponge Method: Keep a damp sponge nearby to lightly moisten surfaces before applying glue (especially effective with polyurethane glues)
- Mechanical Interlocking: Combine glue with dowels, biscuits, or dominoes for added strength
- Clamping Pressure Monitoring: Use pressure-sensitive films to ensure ideal clamping pressure (about 100-150 psi for most joints)
- End Grain Treatment: Apply dilute glue (50/50 glue and water) to end grain first, let dry, then apply full-strength glue
- Double Gluing: Apply glue, let it soak in for 5 minutes, then apply fresh glue before assembly
Case Study: A professional cabinet maker in Portland solved chronic joint failures in humid conditions by:
- Switching to waterproof resin glue
- Implementing a 24-hour curing period in a climate-controlled space
- Using pressure monitoring films to ensure proper clamp pressure
This systematic approach to fixing glue issues in woodworking projects resulted in zero joint failures over two years of production.
3. Glue Drying Time: Complete Control in Any Environment
Fixing glue issues in woodworking projects often revolves around mastering drying times. Different projects require different approaches:
Slow-Drying Solutions:
- Add 5-10% distilled water to PVA glue for longer working time
- Use extended-set epoxies that give 30+ minutes working time
- Apply glue to one surface and activator to the other (certain glue systems)
- Work in cooler environments (ideal range 65-75°F)
- Use hide glue which remains workable when kept warm
Fast-Drying Techniques:
- Use accelerators for cyanoacrylate (CA) glues
- Apply thin layers that cure faster than thick ones
- Use heat guns or hair dryers on low setting to speed cure (with caution)
- Work in warmer environments (not exceeding 90°F)
- Choose fast-set formulations (like 5-minute epoxy)
Regional Tip: Woodworkers in Arizona’s dry climate often add a few drops of glycerin to their PVA glue to prevent premature drying, while those in Florida’s humidity might use dehumidifiers in their glue-up area to control cure times when fixing glue issues in woodworking projects.
4. Specialized Solutions for Problem Woods
Fixing glue issues in woodworking projects becomes more challenging with difficult-to-glue woods like:
- Oily Tropical Hardwoods: Teak, rosewood, ipe
- Resinous Softwoods: Pine, spruce (especially with high sap content)
- Treated Lumber: Pressure-treated wood with chemical preservatives
- Stabilized Woods: Resin-impregnated blanks
- Exotic Species: Ebony, lignum vitae, some mahoganies
Professional Approaches:
- Surface Preparation:
- Wipe with acetone or denatured alcohol
- Sand immediately before gluing (within 15 minutes)
- Use a wire brush on end grain
- Apply a “wetting coat” of diluted glue first
- Specialty Adhesives:
- Epoxy with high filler content
- Polyurethane glues that expand into pores
- Two-part acrylics designed for oily woods
- Resorcinol formaldehyde for exterior use
- Mechanical Enhancement:
- Groove surfaces with a saw or router for mechanical grip
- Combine glue with mechanical fasteners
- Use floating tenons or splines
- Create “mechanical keys” with a forstner bit
Proven Technique: For teak outdoor furniture, many professional boat builders use the following process for fixing glue issues in woodworking projects:
- Sand with 80 grit
- Wipe with acetone twice (letting dry between)
- Apply epoxy with silica thickener
- Clamp for 24 hours at 70°F minimum
This creates bonds that withstand years of marine exposure.
Regional Solutions for Fixing Glue Issues in Woodworking Projects

Your geographic location dramatically affects glue performance. Here’s how professional woodworkers adapt across different climates:
Humid Climates (Southeast, Pacific Northwest):
- Use water-resistant glues (Titebond III, epoxy)
- Store glue in airtight containers with desiccant packs
- Allow extra curing time (up to 50% longer in high humidity)
- Consider moisture-cured polyurethanes
- Use dehumidifiers in glue-up areas
- Implement the “dry fit first” rule to minimize open time
Dry Climates (Southwest, Mountain States):
- Add humidifiers to workshop
- Use slower-setting glues
- Mist joints lightly before assembly
- Store glue bottles upside down to keep nozzles clear
- Work during cooler parts of the day
- Keep glue application areas small (sectional gluing)
Cold Regions (Northern States, Alaska):
- Warm glue bottles in water bath before use (not exceeding 100°F)
- Use winter-grade adhesives
- Create temporary curing chambers with space heaters
- Pre-warm wood surfaces with heat guns (carefully)
- Extend clamping times significantly
- Consider urea-formaldehyde glues for cold weather
Traditional Wisdom: The Amish woodworkers of Pennsylvania have developed unique solutions for fixing glue issues in woodworking projects during winter by:
- Using hot hide glue kept liquid in heated pots
- Pre-warming joints near wood stoves
- Building temporary curing boxes lined with insulation
These time-tested methods allow them to produce furniture year-round in unheated shops.
Advanced Tools and Products for Professional Results
Fixing glue issues in woodworking projects requires the right equipment. Beyond basic clamps and brushes, professional shops use:
Specialized Application Tools:
- Glue Rollers: For perfectly even thin coats (look for silicone rollers)
- Needle-Tip Bottles: Precision application in tight spaces (great for veneer work)
- Glue Injectors: For deep mortise and tenon joints (essential for chair making)
- Glue Brushes: Natural bristle for hide glue, synthetic for PVA
- Spreaders: Notched trowels for large surface bonding
High-Performance Adhesives:
- Structural Epoxies: For high-stress joints (like System Three T-88)
- Hide Glue: Traditional reversible joints for antique repairs
- CA Glues: Instant bonds for small repairs (different viscosities)
- Contact Cements: For laminates and veneers
- Plastic Resin Glues: For bent laminations
Workshop Essentials:
- Humidity/temperature monitors (digital models with memory)
- Dedicated glue storage cabinet (temperature controlled)
- UV curing lights for specialty adhesives
- Glue thickness gauges (for consistent application)
- Vacuum press systems for veneer work
Professional Recommendation: Invest in a high-quality glue botle like the “GlueBot” system that keeps hide glue at perfect working temperature for hours – a game changer for fixing glue issues in woodworking projects involving traditional joinery.
Step-by-Step: Fixing Common Glue Problems
When you’re faced with glue issues, follow these professional procedures:
Repairing a Failed Glue Joint:
- Diagnose the failure reason (starved joint, contamination, etc.)
- Remove all old glue completely (chisel, sand, or scrape)
- Recut mating surfaces for fresh wood exposure
- Dry fit and adjust for perfect alignment
- Apply appropriate adhesive (consider stronger type)
- Clamp with proper pressure (use pressure indicator film)
- Allow full cure time (longer than initial instructions)
- Test joint before proceeding with project
Salvaging a Glue-Stained Project:
- Identify the glue type (PVA, epoxy, etc.)
- Determine the wood species and finish type
- Select appropriate solvent (start with mildest option)
- Test on inconspicuous area (inside a joint or underside)
- Work gradually from least to most aggressive methods:
- Damp cloth
- Plastic scraper
- Fine sandpaper (220+ grit)
- Chemical removers
- Sharp cabinet scraper
- Refinish affected area carefully
- Apply lessons learned to prevent recurrence
Restoration Tip: For antique pieces where you can’t risk damaging original surfaces, consider using a steam method for fixing glue issues in woodworking projects – the gentle moisture can often loosen old glue without harming the wood or finish.
Maintaining Your Glue Supplies
Proper storage is crucial for fixing glue issues in woodworking projects before they start. Follow these professional guidelines:
PVA Glues:
- Store between 50-70°F (avoid freezing or excessive heat)
- Keep containers tightly sealed (replace caps carefully)
- Write purchase date on bottles (lifespan typically 1 year)
- Store upside down to prevent skin formation
- Watch for separation or sour smell (signs of spoilage)
Epoxy Systems:
- Keep resin and hardener in original containers
- Store in cool, dark place (light can degrade components)
- Use within manufacturer’s shelf life (typically 6-12 months)
- Keep containers absolutely clean (contamination ruins batches)
- Consider refrigerator storage for long-term preservation
Polyurethane Glues:
- Seal tightly after each use (reacts with moisture)
- Store in dry environment (use desiccant packs)
- Watch for crystallization in nozzle (clear before use)
- Replace if bottle becomes hard (indicates moisture ingress)
Hide Glues:
- Keep dry granules in airtight container
- Prepared liquid glue lasts 3-7 days refrigerated
- Discard if mold appears or smell becomes foul
- Store in heated pots for all-day use
Professional Practice: Many cabinet shops implement a “glue rotation” system for fixing glue issues in woodworking projects before they occur – new stock is always placed behind older bottles, and any glue over 6 months old is used for non-critical applications.
The Future of Woodworking Adhesives
Emerging technologies are changing how we approach fixing glue issues in woodworking projects:
Bio-based Adhesives:
- Soy protein-based glues (renewable and sustainable)
- Casein formulations (improved modern versions)
- Lignin-based adhesives (byproduct of paper industry)
- Mushroom mycelium binders (experimental but promising)
Smart Glues:
- Color-changing indicators for proper cure
- Temperature-sensitive formulations
- Reversible bonds for easy repairs
- Self-healing properties for micro-cracks
Nanotechnology Adhesives:
- Carbon nanotube reinforced glues
- Graphene-enhanced formulations
- Microscopic fiber reinforcement
- Ultra-thin but incredibly strong bonds
Industry Insight: Major adhesive manufacturers are investing heavily in formaldehyde-free alternatives that maintain performance while being more environmentally friendly – a key development in fixing glue issues in woodworking projects for health-conscious craftsmen.
Final Thoughts: Mastering Glue in Your Workshop
Fixing glue issues in woodworking projects is an ongoing learning process. Even after decades as a professional woodworker, I still encounter new challenges and discover innovative solutions. The key is to:
- Maintain detailed notes on what works for your specific conditions
- Invest in quality adhesives and application tools appropriate for your work
- Never stop experimenting with new techniques and products
- Share knowledge with other woodworkers (we all learn from each other)
- View every glue “failure” as a learning opportunity
Remember that every master woodworker has dealt with glue problems – what separates the professionals is their systematic approach to fixing glue issues in woodworking projects and their willingness to continuously improve their methods.
Complete Troubleshooting Guide
Presented in an easy-to-scan table format for quick reference:
| Problem | Likely Causes | Immediate Solution | Long-Term Prevention |
|---|---|---|---|
| Glue stains | Excess squeeze-out, slow cleanup | Scrape/sand affected area | Use masking tape, wipe immediately, control application |
| Weak joints | Starved joint, contamination | Reinject glue, reclamp | Proper glue amount, clean surfaces, even pressure |
| Slow curing | Low temperature, high humidity | Move to warmer area | Maintain shop above 60°F, use dehumidifier |
| Bubbly glue | Old/contaminated glue, improper mixing | Replace adhesive, remix | Store properly, check expiration, mix thoroughly |
| Premature drying | High temp, low humidity, thin application | Mist area lightly | Control environment, use slower glue, apply thicker |
| Failure over time | Material movement, poor glue selection | Reinforce with mechanical fasteners | Choose flexible adhesives, allow for wood movement |
Frequently Asked Questions
Q: How can I tell if my glue is still good?
A: For PVA glues, check for separation, unusual thickness, or sour smell. Good PVA should pour smoothly like milk. Epoxy should have no crystallization in either part. Polyurethane glue bottles should still be flexible.
Q: Is there a universal glue for all woodworking projects?
A: While no single glue does everything perfectly, Titebond III offers the best balance of strength, water resistance, and ease of use for most applications. However, professional shops typically maintain 4-5 specialized adhesives.
Q: Why do my glue joints fail in winter?
A: Cold temperatures slow curing and can prevent proper bonding. Many glues won’t cure properly below 50°F. Try warming your shop or using cold-weather formulations specifically designed for low-temperature application.
Q: Can I mix different glue types?
A: Generally not recommended as they may interfere with each other’s curing processes. However, some professionals use a “hybrid” approach with hide glue for reversibility and PVA for initial strength in certain applications.
Q: How long should I wait before sanding a glued joint?
A: Wait at least 24 hours for PVA glues, 48 for polyurethane, and follow manufacturer instructions for epoxies (typically 24-72 hours). When in doubt, wait longer – premature sanding can clog paper and smear uncured glue.
Q: What’s the best way to clean glue brushes?
A: For PVA, rinse immediately in warm water. For hide glue, use hot water. For epoxy or polyurethane, use appropriate solvents (acetone for epoxy, mineral spirits for polyurethane). Consider disposable brushes for messy adhesives.
By mastering these comprehensive techniques for fixing glue issues in woodworking projects, you’ll spend less time troubleshooting and more time creating beautiful, durable pieces that will last for generations. Remember that glue mastery is a journey – start with the fundamentals, build your experience, and don’t be afraid to experiment (on scrap wood first!). Happy woodworking!